The BMP180 and BMP280 air pressure sensors operates on the S2C protocol which much be setup before using this device. To do this, visit this section.
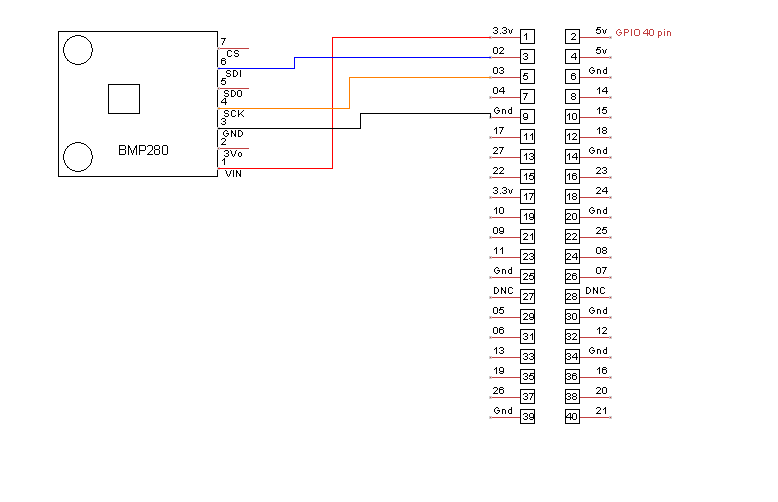
Use the following wiring diagram to connect your device. Note that SDI and SCK MUST be connected to pins 3 and 5 as I2C devices must communicate on those pins.
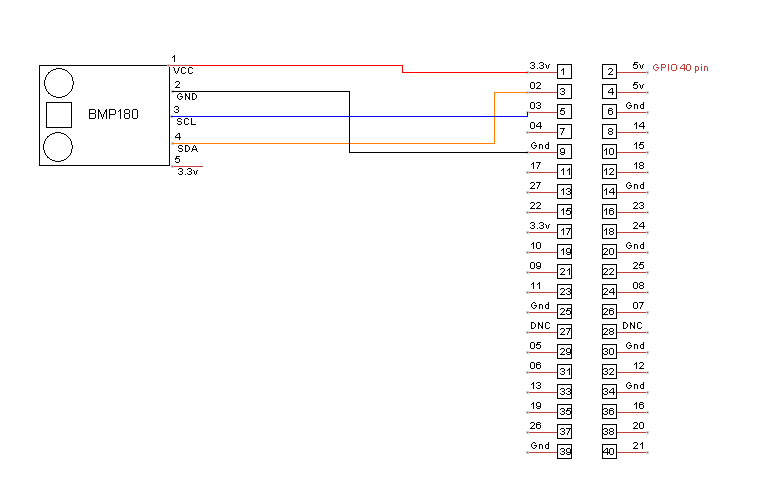
Use the following wiring diagram to connect your device. Note that SCL and SDA MUST be connected to pins 3 and 5 as I2C devices must communicate on those pins.
Both the BMP180 and 280 sensors will work in a similar fashion, for either sensor, you may following the next instructions.
Turn on your raspberry Pi and let it boot up. Once you are logged in, run the following command
i2cdetect -y 1
You will presented with a map like the following:
     0  1  2  3  4  5  6  7  8  9  a  b  c  d  e  f
00:          -- -- -- -- -- -- -- -- -- -- -- -- --
10: -- -- -- -- -- -- -- -- -- -- -- -- -- -- -- --
20: -- -- -- -- -- -- -- -- -- -- -- -- -- -- -- --
30: -- -- -- -- -- -- -- -- -- -- -- -- -- -- -- --
40: -- -- -- -- -- -- -- -- -- -- -- -- -- -- -- --
50: -- -- -- -- -- -- -- -- -- -- -- -- -- -- -- --
60: -- -- -- -- -- -- -- -- -- -- -- -- -- -- -- --
70: -- -- -- -- -- -- -- 77
This polls bus 1 of the i2c system, which is the one the model 3 uses.
Devices connected using i2c will be listed in this screen. In this case a device is connected at address 77.
Once you’ve connected the device and booted, now proceed to add the sensor from Light Sensor → BH1750
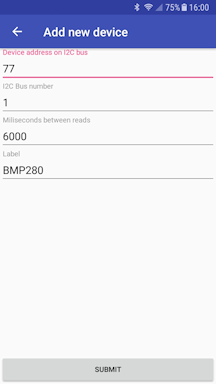
Note that the Address and Bus are separate entries. Be sure that you select the proper address as displayed in the graph. In our example it is 77 on bus 1.
Once added, the client will display the ambient air pressure in hectopascals (hPa).
In some cases the BMP280 sensor might not receive enough power from the breakout board or ribbon cables. i2cdetect will show devices if they are receiving enough power, however if none is shown, or you get an entry of 00 someplace in the matrix, your device might not have enough power to run.
Tigase IoT One Cloud is compatible with the BMP180 and BMP280 devices, they are similar and will both provide the same information however, the BMP280 provides slightly more accurate results.
| Field | BMP180 | BMP280 |
|---|---|---|
Temp range | -40-85C | -40-85C |
Temp Accuracy | +/- 1C | +/- 1C |
Pressure range | 300-1100 hPa | 300-1100 hPa |
Pressure Accuracy | +/- 1hPa | +/- 0.12hPa |
Max Sampling Rate | 1Hz | 1Hz |
The same sensor can be used for both Temperature and Pressure samplings, and you may setup 2 devices on the same pin to poll both.