1. Jabber/XMPP introduction
1.1. Jabber/XMPP is Instant Messaging Technology
All federated XMPP servers are connected in one global communications network allowing you to send messages to friends who have accounts on other Jabber servers.
This is very much like sending e-mail but the difference between Jabber and e-mail is the same as the difference between sending a traditional mail and talking on the phone.
All messages sent through Jabber are sent instantly and you also receive responses instantly. More over you can see whether your mate is online and available for talking or not.
There exists similar technologies to Jabber like Yahoo, MSN, and ICQ. There are, however, quite a few differences.
XMPP is an open standard which means everybody can know how it works, everybody can implement their own software connecting to the network both client and server side.
The server side is actually the biggest difference and advantage. Many companies have offices in different locations, and such instant messaging technology could be very useful to employees for communication. Companies are not inclined to allow confidential discussions to go outside the company’s network. Especially if it is not very secure to leave such information on third party public servers.
XMPP servers on the other hand, allows you to deploy server software on your own company network. Employees can then talk securely and all information remains on the company’s secure network. Of course if offices are located in different locations or countries then all messages are transmitted over the public network - the Internet. This is not a problem since XMPP supports SSL/TLS - secure encrypted connections which helps you protect your discussion.
Then if your employees need to contact customers outside your company, the whole discussion can go through your server and a server located on the customer side.
There are many other scenarios and use cases but I hope this brief introduction gives you an idea of the differences and advantages of XMPP technology.
2. Installing Minichat on Your Website
We have made Minichat available to demonstrate new projects we are working on, to run some tests, and collect your opinions. The feedback we’ve recieved has exceeded our expectations. The most common question was: Can I/how can I install this on my website?
Installing Minichat on your website is very simple so I am providing instructions here for all of you that want to include the Minichat client on your website and allow visitors to chat with you.
Just to remind you - this code is under development and will be updated and changed frequently. It may even stop working temporarily or permanently. We can and will intentionally block certain users or IP addresses if we discover any abuse. If you are ready for this and still want to use it continue reading…
First thing to know: Minichat will only work with the tigase.org XMPP server right now. This is not because of some limitations in the code or special non-standard implementation. This is to simplify deployment of the service. If you wanted Minichat to connect to a different domain or XMPP server the installation would be much more difficult, involving Apaches proxy mod installation, configuration and possibly Bosh component/server deployment.
Second thing to know: Minichat connects to the server as anonymous user. To avoid sending spam the anonymous user can only send messages to users within the XMPP server. It means that although you can configure Minichat to send messages to user@jabber.org, Tigase server won’t deliver those messages.
2.1. Instructions:
-
Register an account on the tigase.org website. For purposes of this guide let’s say the account name is: your-account. The Jabber ID will be: your-account@tigase.org.
Note! There seems to be some confusion so let me clarify this. You create an account on the www.tigase.org website but your Jabber account domain is: tigase.org.
-
Setup the Jabber/XMPP client of your choice to connect to the Tigase server in domain: tigase.org. Note you must allow plain text login. TLS is supported so the connection is secure and your password is still safe.
-
There are a few ways for adding the client to the website but you always use startup parameters as URL query to the client link. Following parameters are possible:
-
jid=your-account@tigase.org tells the client who you want website visitors talk to. Normally you put your own account here.
-
name=YourName screen name (displayed name) of your account.
-
domain=tigase.org domain name you want Minichat to connect to. At the moment only tigase.org is allowed.
-
autologin=true determines whether the Minichat client automatically connects to the server when the page is loaded or waits for the visitor to click on the title bar.
-
The first way described is to put the client in exactly the same way as it is on the www.tigase.org website. The chat window is always visible but the client is not connected to the server until someone clicks on the Minichat title bar. Include in your page following code:
<iframe src="http://minichat.tigase.org/MesComp.html?jid=your-account@tigase.org&name=YourName&domain=tigase.org" width="220px" height="250px" frameborder="0"></iframe>-
By adding a single bit of code: autologin=true the client automatically connects to the server and is ready for chatting without need to click on the title bar.
<iframe src="http://minichat.tigase.org/MesComp.html?jid=your-account@tigase.org&name=YourName&domain=tigase.org&autologin=true" width="220px" height="250px" frameborder="0"></iframe> -
A third option is the least intrusive but the most complex to install. It puts a small, clickable image with text on your page: Click to chat with…. When the website visitor clicks a new window pops up with the Minichat which automatically connects to the server. You need to put some code in the web page header:
<link rel="stylesheet" type="text/css"
  href="http://minichat.tigase.org/minichat.css"/>
<link rel="stylesheet" type="text/css"
  href="http://minichat.tigase.org/mygwt-all.css" />
And similar to other configurations code in the web page body:
<iframe
  src="http://minichat.tigase.org/Runner.html?jid=your-account@tigase.org&name=YourName&domain=tigase.org"
  width="220px" height="250px" frameborder="0"></iframe>
-
Enjoy and send us your comments…
3. How to Use Tigase Service
3.1. This Article Describes How to use tigase.org Service for Instant Communications
You have to install and run a Jabber client application to use the service.
3.1.1. Short instructions:
Usually you just need to enter the user name of the form: user@tigase.org. Your XMPP client should take care of all other things as our service doesn’t need any special settings. If you don’t have an account on tigase.org server yet just tick the option to register new account. That’s it!
3.1.2. Long Instructions:
The good news is that there are many programs to choose from which allow you to communicate through our server. So you can pick up your favorite application or use an existing one that is compatible and start using our service.
All clients presented below support multiple accounts on Jabber or XMPP servers. What this means is that you can have a few Jabber accounts on different servers and you can still use just one program to connect to all of them at the same time.
The full list of all known XMPP clients is very long. You can obviously try them all but below is a selection which is recommended by the Tigase team. The selected programs might not be the best choice for you, but these programs have been tested and we can offer help with using them. Here is a list of recommended instant messaging clients:
-
Psi Pure XMPP client. Although it supports only Jabber networks it is a very user friendly and comfortable program. It works on most popular operating systems like Linux, MS Windows, and Apple MacOS X.
-
Gajim This is another Jabber only client. Very user friendly and works on most of Linux distributions, FreeBSD, and MS Windows.
-
Pidgin (previously Gaim) This is not just a Jabber client. This type of application is called multicommunicator as apart from Jabber it supports many other instant messagin networks/protocols such as: AIM/ICQ, MSN, Yahoo, Gadu-Gadu, IRC, and a few others. So it is especially convenient if you have friends using other messaging networks. Pidgin works on most Linux distributions, and on MS Windows.
-
Kopete This is a KDE component and although it only works on Linux based system it also supports many of the most popular instant messaging protocols apart from Jabber like: AIM, Gadu-Gadu, ICQ, IRC, MSN, Yahoo.
Install the XMPP client of your choice and set up for a Tigase account.
4. Configuration Instructions for Psi
4.1. Psi - Initial Configuration
The first time you run Psi you see a screen like this:
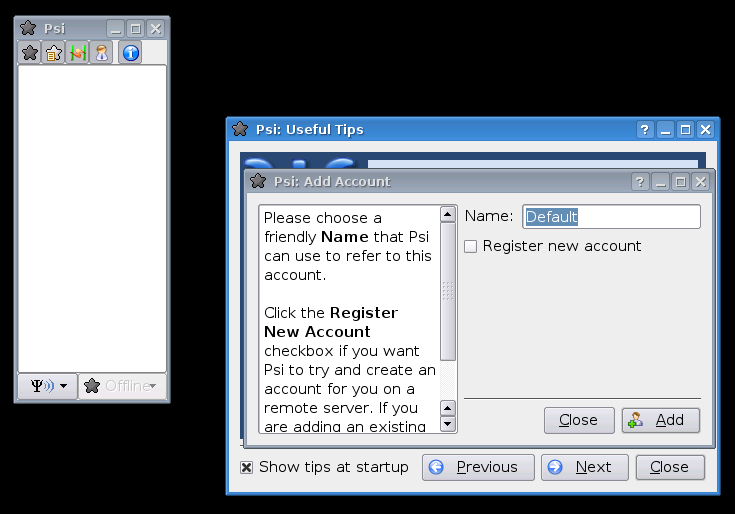
To connect to tigase.org server we need to configure the program. Below are step-by-step instructions for novice users on how to setup Psi.
-
Psi can connect to many servers at the same time so we have to identify each connection. The first thing to do is assign a name to the connection we just created. As we are going to define connection to tigase.org server let’s just name it: Tigase.
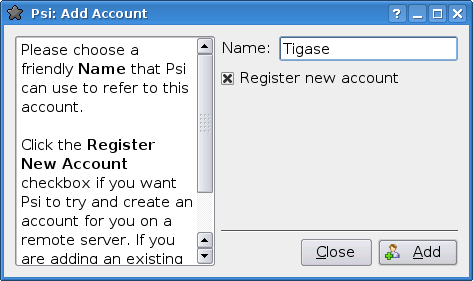
Note! At the moment you can register an account through the Web site only. This is a single account for both services: The Drupal website and XMPP service on the tigase.org domain. If you want to have a Jabber account on the tigase.org server go to the registration page, un-tick "Register new account", and go to the point no 5. You can use guide points 2-4 to register a Jabber account on any other Jabber server.
-
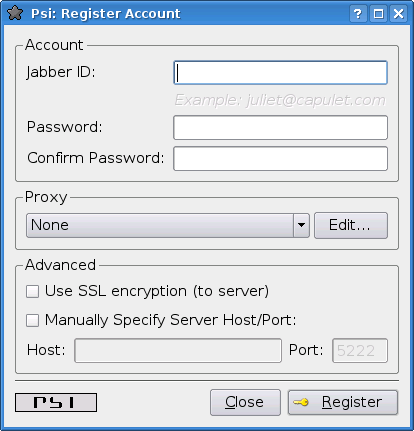
When you press the Add button you will see next window where you can enter your Jabber account details:
-
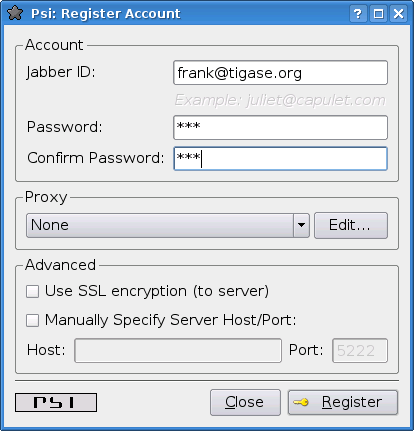
Invent your user name for the account on Tigase server. Let’s assume your user name is: frank. Jabber ID’s however consist of 2 parts - your user name and server address. Exactly the same as an e-mail address. As you are registering an account on tigase.org server, you will have to enter in this field: frank@tigase.org. Next enter your password and click the Register button.
-
On successful registration you will receive a confirmation message and you should see a window like this:
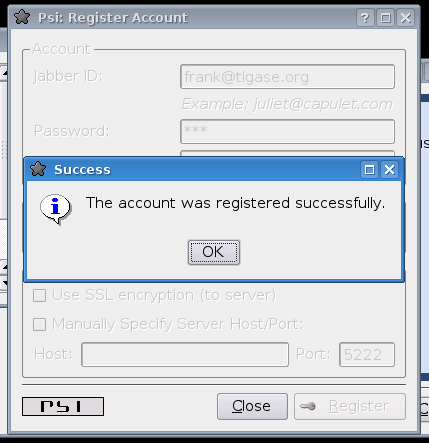
It is possible that somebody may have already registered your chosen username. If so, you will receive error message and will then have to select another user name and try to register again.
-
After clicking the OK button you will see a window with your connection and account setup. You can stick with default values for now.
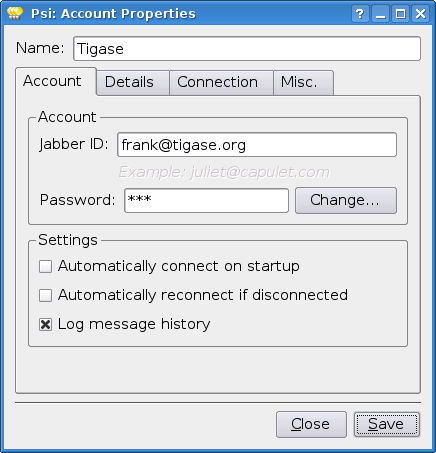
Just click the Save button and this window closes.
-
Now you have your account configured and ready to use but you are still off-line. You can find out whether you are on-line or off-line by looking at the bottom of main Psi window. There you can see Offline text.
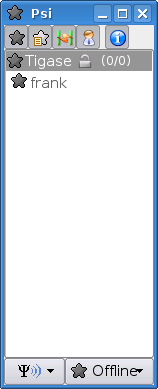
Click on this Offline text and you will see a list of possible options. Just select Online.
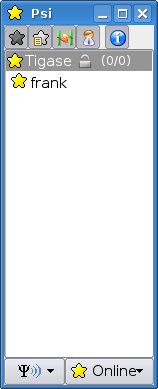
Now you are connected!
The box also allows you to choose other online statuses which can tell other users if you are away or busy.
Well, you are now connected but how to talk to other people? How to add friends to the contact list?
You can send a message to your friends stright away using the Psi menu option New blank message. It is much more convenient however, if you could see which of your friends is online and available for chatting and if you could start talking to your friend just by clicking on his name.
4.2. Short Instructions How to Add Your First Contact
-
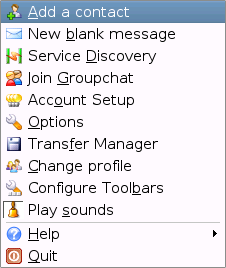
Click on Psi menu - the button next to the Online text. You will see something like this:
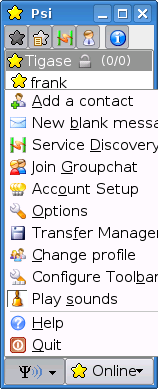
From all menu options select the top one - Add a contact:
-
The next window will display where you can enter your contact details:
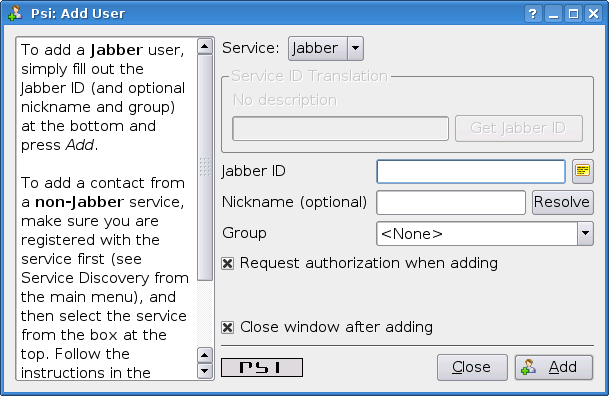
You have to know the Jabber ID of the person you want to add to your contact list. Let’s assume, for example, you want to add Tigase server administrator’s Jabber ID to your contact list. So, after you enter these details the window will look like this:
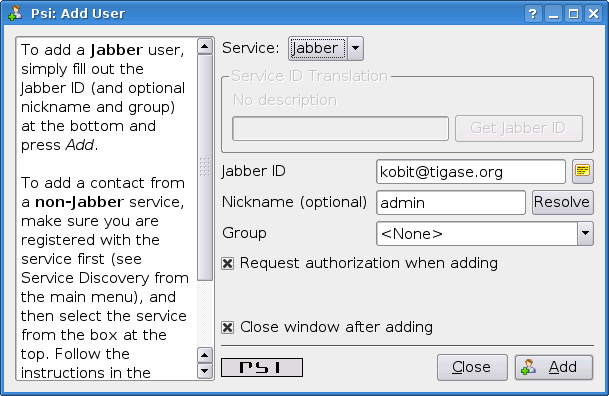
Click the Add button.
-
Now you will see a confirmation window that a new person has been added to your contact list:
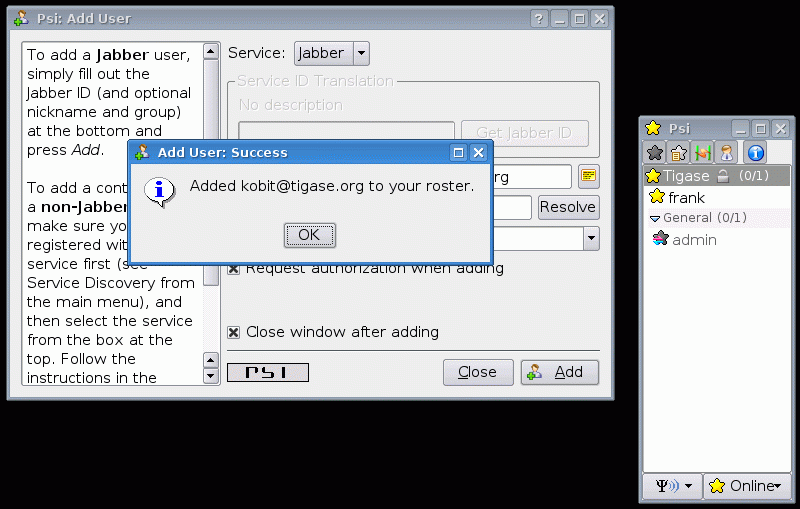
But there is more behind the scenes. Adding a contact to your Roster (contact list) usually means you can see whether the person is online and available to talk or not. The person however, may not wish you to see his presence. So, to make sure the other person accepts you as a friend Psi sent a request to the address you just entered with the question of whether he agrees to show his presence to you.
You won’t be able to see the users availability until he sends confirmation.
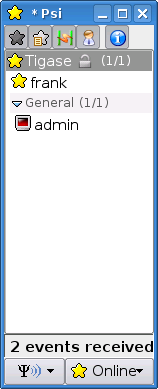
-
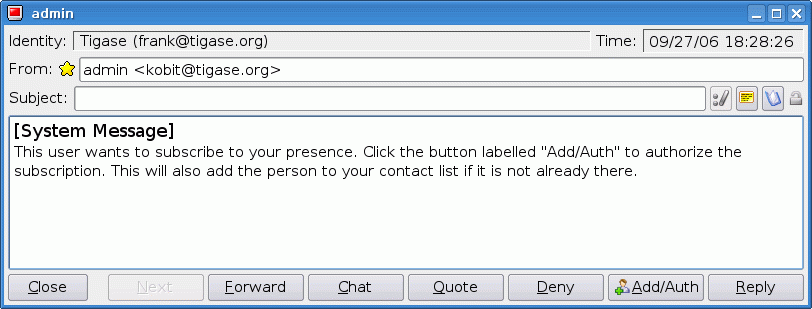
Once the other user sends confirmation back, you will usually receive 2 system events:
-
Click on the contact to see a window with these messages:
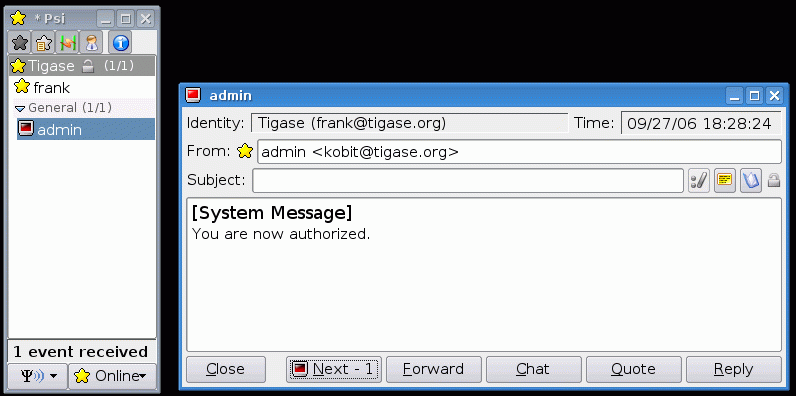
-
One message just says you have been authorized by the other user:
So you simply click Next to see the second message.
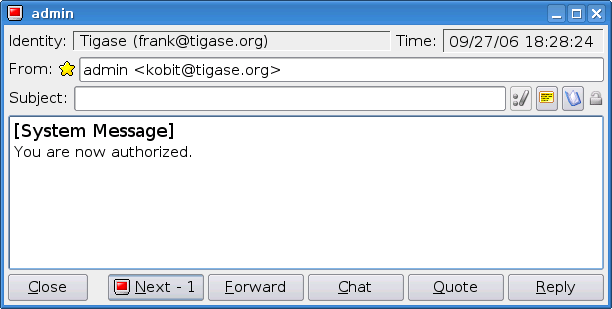
-
The second message is a bit more interesting. It contains the question of whether you also authorize the other user to see your presence. If you want to accept this request just click Add/Auth.
-
Finally main Psi window with your new contact:
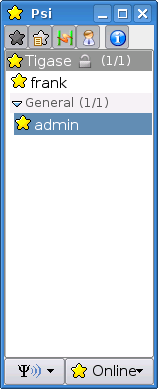
Well done!
You are ready to start Jabbering. Good luck.
Where to go next? For detailed Psi documentation refer to the program Wiki page: http://psi-im.org/wiki/Main_Page