The first time you run Psi you see a screen like this:
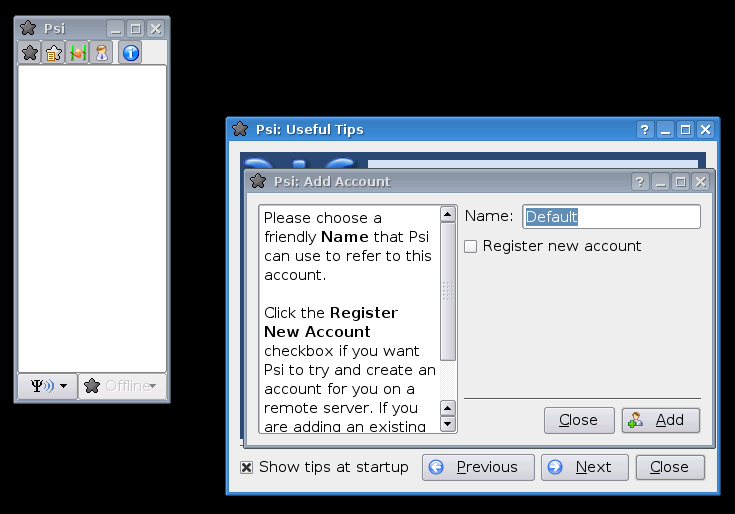
To connect to tigase.org server we need to configure the program. Below are step-by-step instructions for novice users on how to setup Psi.
Psi can connect to many Jabber servers at the same time so we have to identify each connection somehow. The first thing to do is assign a name to the connection we just created. As we are going to define connection to tigase.org server let’s just name it: Tigase.
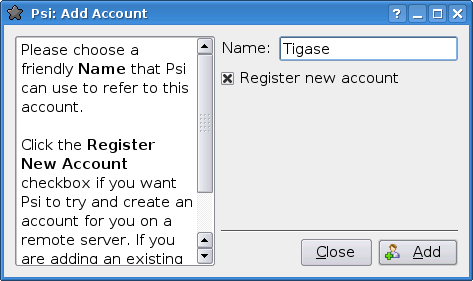
Note! At the moment you can register an account through the Web site only. This is a single account for both services: The Drupal website and Jabber/XMPP service on the tigase.org domain. If you want to have a Jabber account on the tigase.org server go to the registration page, un-tick "Register new account", and go to the point no 5. You can use guide points 2-4 to register a Jabber account on any other Jabber server.
When you press the Add button you will see next window where you can enter your Jabber account details:
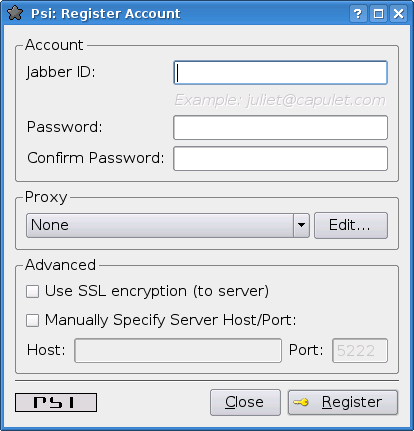
Invent your user name for the account on Tigase server. Let’s assume your user name is: frank. Jabber ID’s however consist of 2 parts - your user name and server address. Exactly the same as an e-mail address. As you are registering an account on tigase.org server, you will have to enter in this field: frank@tigase.org. Next enter the password of your choice and click the Register button.
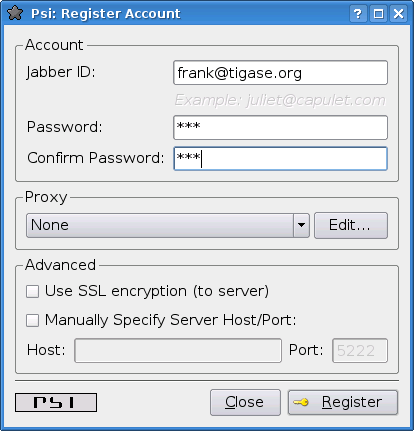
On successful registration you will receive a confirmation message and you should see a window like this:
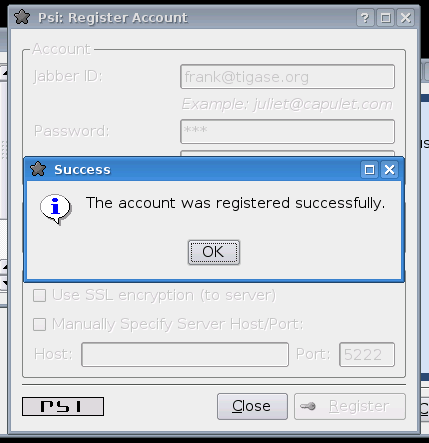
It may happen that somebody earlier registered an account with the same name you’ve selected for yourself. If so, you will receive error message. You will then have to select another user name and try to register again.
After clicking the OK button you will see a window with your connection and account setup. You can stick with default values for now.
Just click the Save button and this window closes.
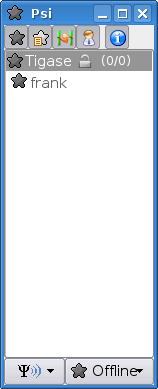
Now you have your account configured and ready to use but you are still off-line. You can find out whether you are on-line or off-line by looking at the bottom of main Psi window. There you can see Offline text.
Click on this Offline text and you will see a list of possible options. Just select Online.
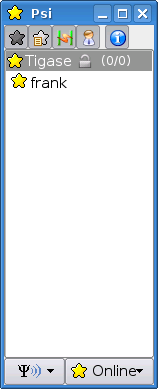
Now you are connected!
Well, you are now connected but how to talk to other people? How to add friends to the contact list? You can send a message to your friends straight away using the Psi menu option New blank message. It is much more convenient however, if you could see which of your friends is online and available for chatting and if you could start talking to your friend just by clicking on his name.
Click on Psi menu - the button next to the Online text. You will see something like this:
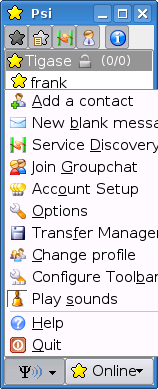
From all menu options select the top one - Add a contact:

The next window will display where you can enter your contact details:
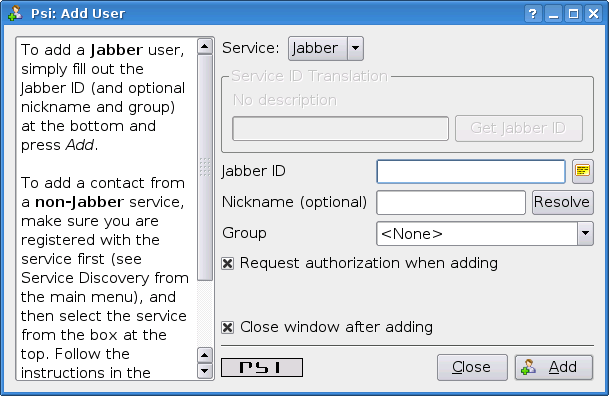
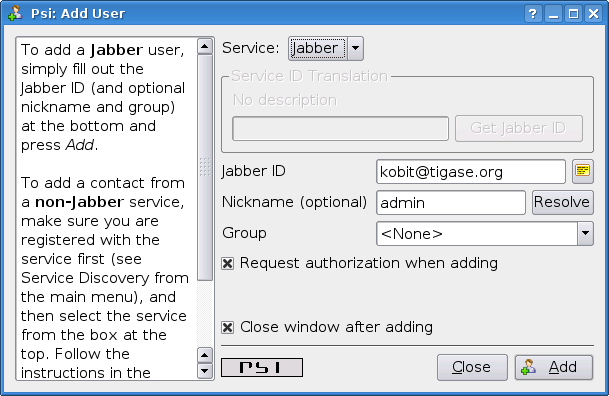
You have to know the Jabber ID of the person you want to add to your contact list. Let’s assume, for example, you want to add Tigase server administrator’s Jabber ID to your contact list. So, after you enter these details the window will look like this:
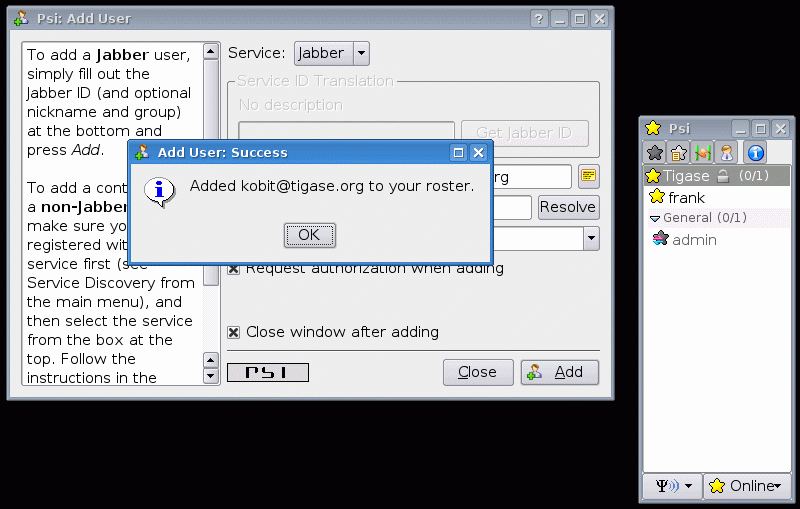
Click the Add button.
Now you will see a confirmation window that a new person has been added to your contact list:
But there is more behind the scenes. Adding a contact to your Roster (contact list) usually means you can see whether the person is online and available to talk or not. The person however, may not wish you to see his presence. So, to make sure the other person accepts you as a friend Psi sent a request to the address you just entered with the question of whether he agrees to show his presence to you.
You won’t be able to see the users availability until he sends confirmation.
Once the other user sends confirmation back, you will usually receive 2 system events:
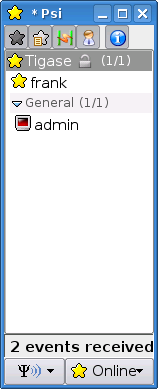
Click on the contact to see a window with these messages:
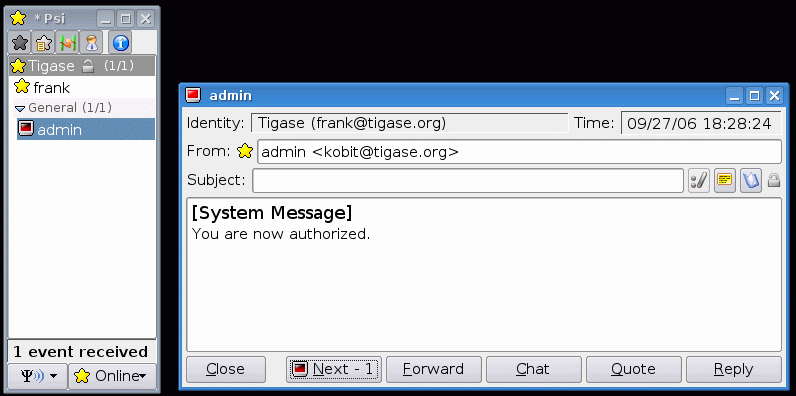
One message just says you have been authorized by the other user:
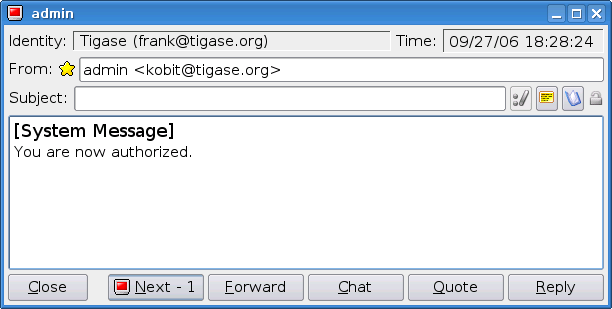
So you simply click Next to see the second message.
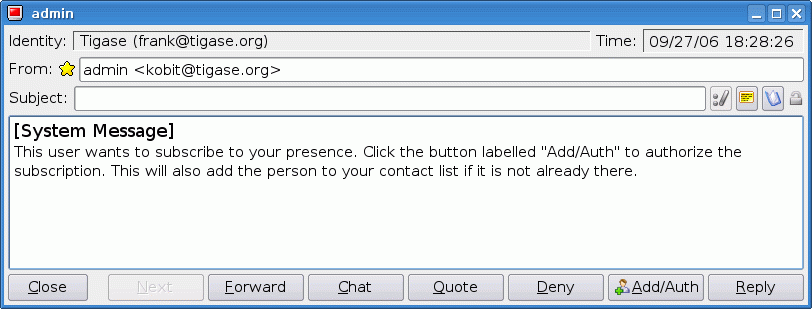
The second message is a bit more interesting. It contains the question of whether you also authorize the other user to see your presence. If you want to accept this request just click Add/Auth.
Finally main Psi window with your new contact:

Well done!
You are ready to start Jabbering. Good luck.
Where to go next? For detailed Psi documentation refer to the program Wiki page: http://psi-im.org/wiki/Main_Page
Welcome to the Tigase Administration Guide.